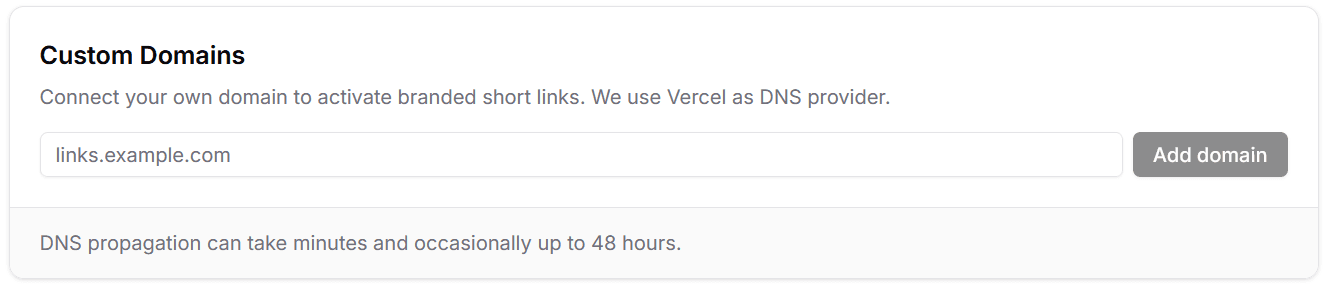
Custom Domains
Use your own branded domain for shortened links on Viso.li. This guide walks you through adding the domain, creating the required DNS record, confirming that the domain is active, and creating branded links with custom slugs.
Two ways to add a domain
1. Add Your Domain
Enter the domain you want to use for branded short links. You can add a root domain such as example.com or a subdomain such as go.example.com, depending on how you want your links to appear.
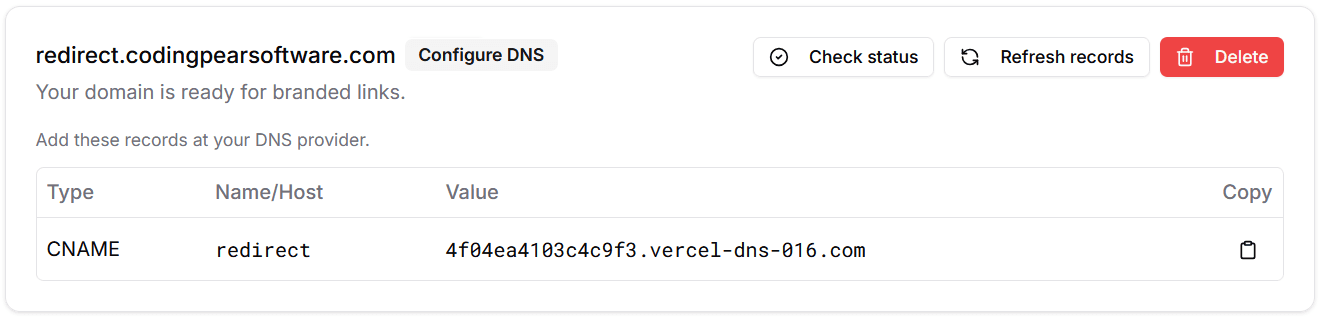
After submitting the domain, Viso.li checks its status and shows the DNS record you need to create.
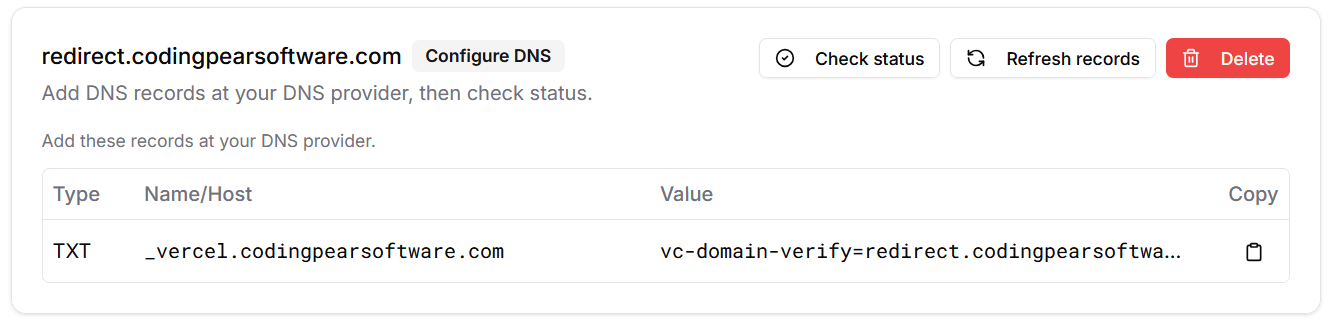
2. Add the DNS Record
Domain verification is handled through Vercel. The record you need depends on where your domain is managed. Copy the values shown inViso.li and add them at your DNS provider.
Use the record shown for your domain
External DNS providers: CNAME
If your DNS is managed outside Vercel, create the CNAME record shown in the dashboard. This points your custom domain to the Vercel target used by Viso.li.
Domains already on Vercel: TXT
If the domain is already configured on Vercel, add the TXT record shown in the verification screen. This confirms ownership without changing where the domain currently points.
3. Wait for Activation
DNS changes can take a little time to propagate. Once Vercel verifies the record, the domain status changes to active and you can select it when creating or managing links.
Ready to use

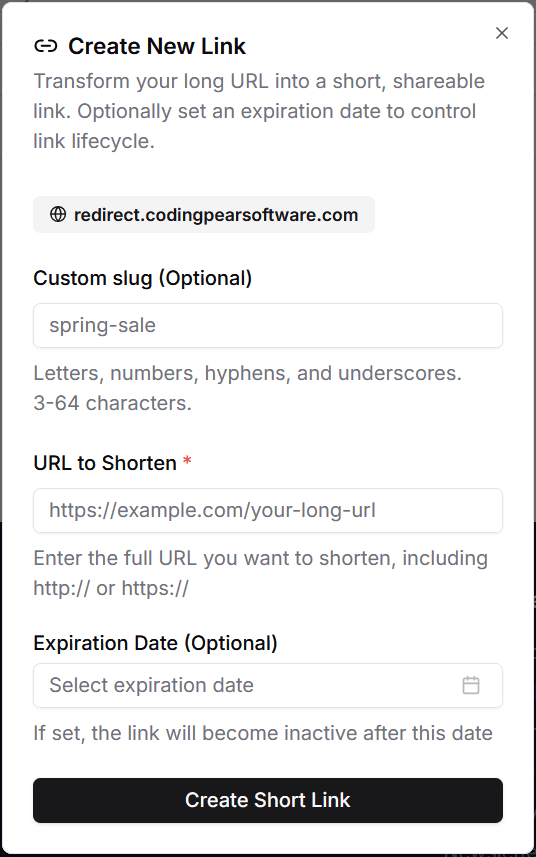
4. Create a Custom Slug
After your domain is active, select it when creating a new link and enter a custom slug to control the full branded URL. For example, a custom slug like spring-sale on your custom domain creates a memorable link for campaigns, launches, or shared resources.
Custom slugs support letters, numbers, hyphens, and underscores, and must be unique for the selected domain.